Rss Feed
  1. Happy Easter!

    Sunday, March 31, 2013


    My Easter Sunday outfit. It was nearly 60 degrees today!

    Dress: Steve Madden
    Jacket: Anne Klein
    Shoes: Franco Sarto
    Tights: Target

    My church had a family-friendly service today, so I got to stay for the whole thing instead of being stuck in the nursery with Aria. The African Choir performed several songs, as did the Nepali Youth Group. Aria mostly stayed in the back with the rest of the kids and colored (on paper and on her hands).


    He is Risen!
    Happy Easter!


  2. Style Update

    Saturday, March 30, 2013


    Yesterday was warm-ish (around 50 degrees) so I went outside to take some photos. I have been waiting for the weather to get warm so I can wear my dresses. 


    Scarf: a gift
    Jacket: H&M
    Sweater: BCBG MAXAZRIA
    Cardigan: Merona
    Dress: H&M
    Tights: Unknown
    Shoes: Alex Marie

    All of these items I've actually bought at Unique Thrift Store over time. 
    I'm pretty awesome at finding good stuff at the thrift store.
    Most of my closet is now thrift store buys. :)


    Linked up with Plane Pretty! Check out her style as well!

  3. Home Update

    Friday, March 29, 2013

    A few home updates since the last time... we (and by we, I mean Jhony) re-arranged Aria's room to make it less cluttered, hung more art up around the house, and I've bought some more plants (mostly fake, but a couple real succulents). Our apartment really doesn't get a lot of light into it, so real flowers don't last long even when I do get a chance to buy some.


    A vintage flour sifter/measuring cup I found at the thrift store - haven't actually used it, right now it's decoration.


    My - now organized - top-of-the-fridge. :) Where I keep my tea.


    Jewelry boxes. 


    Aria's bed. Loaded with stuffed animals - all of them were mine, some I've had since I was 5 years old!


    Aria's artwork above her changing table.


    Quilt from Cambodia hanging on the wall in Aria's room.


    Watercolor painting that Aria helped me with. :)


    Painting I did for Aria's room.


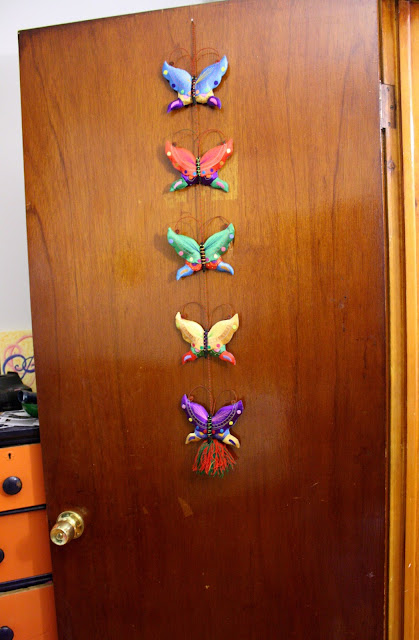
    Butterflies from Cambodia on Aria's door.


    Our gallery wall so far, All the artwork and photos are done by me except for the drawing at the top of the apple and orange kissing. :) That one was drawn for me by a friend back in high school.


    My new little succulent plants that I got at CVS. haha... I've had them for about a week and they seem to be doing fine. I've been on the search for the right pot to transplant them into but I haven't found the right one yet.


    My new-found love. One of the moms at our playgroup brought some of these and I have been addicted ever since. I went to Trader Joe's and bought a couple bags of my own only to discover how easy it is to down an entire bag. I ate both bags in about 3 days. And then I was sad. Mostly because the Trader Joe's is too far away for me to go very often. Lesson learned. Buy more coconut. :)


  4. Recipes from The Kitchn

    Monday, March 25, 2013


    No that is not a typo in the title. One of my favorite places to find new recipes is The Kitchn, it is a part of the website Apartment Therapy - which I also love. Apartment Therapy has information for renters and homeowners on how to decorate or renovate your home along with anything else that has to do with renting or owning a home. Great resource. The Kitchn is similar, recipes, reviews on kitchenware, reader questions, etc. So here are a couple recipes that I got from The Kitchn and tried out.

    Spicy Glass Noodles with Crispy Pork (Yum Woon Sen)
    Both recipes are delicious! Try them out!


    Grown-up Tuna Casserole
    The only thing I changed about the Tuna Casserole is that I left out the mushrooms. I don't like them, and the recipe worked just fine without them.


  5. I always liked buying Dinner Mints at the dollar store, they just melt in your mouth. It was dangerous, I felt like I could eat a whole bag by myself. O_o 
    So when I found this recipe online I knew I had to try it out. It is surprisingly easy and has very few ingredients. It doesn't taste exactly the same as the dollar store variety because it's made with butter so it has a slight buttery taste. If you made it with shortening instead it might taste closer to Dinner Mints. It's still delicious using this method though. And Aria agrees, as you can see below. :)


    Homemade Butter Mints
    recipe from here
    no-bake, makes about 200 mints

    - 1/4 cup butter, softened
    - 1/4 teaspoon salt (if you use salted butter skip the addition of the salt)
    - 3 1/4 cups powdered sugar, plus more if needed
    - 1/3 cup sweetened condensed milk
    - 1/2 teaspoon peppermint extract (be careful not to add too much)
    - food coloring

    In a medium/large mixing bowl beat the butter and salt until creamy. Add powdered sugar, sweetened condensed milk, and peppermint extract on medium-low speed until a dough forms. If the dough seems a little wet, add more sugar. The dough will be crumbly, but will come together when pinched and squeezed into a ball.

    Taste the batter. If you want a more intense mint flavor, add more extract. But be very careful adding more extract because it cannot be undone and the smallest amount can make a drastic difference in flavor.

    Remove dough from the mixer and divide in half. Add one half back into the mixer and squirt a few drops food coloring of your choice onto the dough. Paddle on low speed until the color is mostly mixed in. Remove colored dough and put the uncolored half into the mixer and color with a different color in the same method. (I made pink and green candies, but feel free to do whatever colors you like.)

    After the dough has been colored, either roll out immediately or keep covered so it doesn't dry out.
    Roll out golf ball-sized balls one at a time into centimeter wide lengths (about the width of your pinkie finger). Cut the lengths with a knife or pizza cutter, about 1 centimeter long. Repeat with all the dough. Let the dough sit out and dry for a couple hours. (Can be eaten straight away but they have a more melt-in-your-mouth quality if allowed to dry out a bit.) Store in an airtight container in the refrigerator.

    Enjoy! 

  6. Lemon Sticky Rolls

    Sunday, March 17, 2013


    I love all things lemon. Especially lemon desserts. I love that perfect blend of sour and sweet.
    So when I found this recipe on The Kitchn, I knew I had to make it.
    They turned out delicious even though I made a mistake. I made the filling too liquid-y, so a lot of it just ended up in the bottom of the pan instead of inside the rolls. The recipe explained the addition of the lemon juice and zest in a kind of convoluted way and I kept forgetting to add it in, and it also depends on how juicy your lemons are. I added more sugar but it still didn't turn out how it was supposed to, instead I had caramelized lemon/sugar all over the bottom. So I changed the recipe to explain it a better way.


    Lemon Sticky Rolls
    recipe from here
    makes 12 large rolls

    Dough
    - 2 1/2 tsp active dry yeast
    - 3/4 cup warm milk
    - 1/2 cup (1 stick) very soft butter, plus 3 TB for roll assembly
    - 1/4 cup white sugar
    - 2 tsp vanilla extract
    - 4 1/2 cups flour
    - 1/2 tsp salt
    - 1/2 tsp nutmeg
    - 2 large eggs
    - zest from 1 lemon

    for sticky lemon filling
    - 1 cup sugar
    - 1/4 tsp nutmeg
    - 1/2 tsp ground ginger
    - zest from 1 lemon
    - lemon juice (from zested lemons)

    Glaze
    - 4 oz. cream cheese, softened
    - 1 cup powdered sugar
    - lemon juice (from zested lemons)
    - zest from 1 lemon (for topping the glazed rolls)

    So you're using 3 lemons total, using both the zest and juice from all three. The amount of juice may vary depending on how much juice your lemons have.


    Make the dough
    (I used my bread machine to make the dough, I just used the dough setting and it did all the work for me, but for those of you who do not have a bread machine, these are the instructions.)

    In the bowl of a stand or hand mixer sprinkle the yeast over the warmed milk and let it sit for a few minutes or until foamy. With the mixer paddle, stir the softened butter, sugar, vanilla, and one cup of the flour into this milk and yeast mixture. Stir in the salt, nutmeg, and the lemon zest. Stir in the eggs and enough of the remaining flour to make a soft yet sticky dough.

    Switch to the dough hook and knead for about 5 minutes, or until the dough is elastic and pliable.
    (If you do not have a stand mixer, stir together the ingredients by hand, then turn the soft dough out onto a lightly floured countertop. Knead the dough by hand for 5 to 7 minutes, or until the dough is smooth, pliable, and stretchy.)
    Lightly grease the top of the dough with vegetable oil, and turn the dough over so it is coated in oil. Cover the bowl with plastic wrap and a towel and let the dough rise until nearly doubled — about one hour.
    Make the filling
    In a small bowl, mix 1 cup sugar with the nutmeg and ginger, then work in the lemon zest with the tips of your fingers until the sugar resembles soft sand. Slowly add the lemon juice  one tablespoon at a time, stirring. Stop when the sugar and lemon juice form a thick, clumpy mixture like wet sand. (This is where I messed up and added too much juice, so be careful not to add too much, it makes rolling the rolls much more difficult.)
    Assemble the rolls
    Lightly grease a 13x9-inch baking dish with baking spray or butter. On a floured surface pat the dough out into a large yet still thick rectangle — about 10x15 inches.

    Spread the dough evenly with 3 tablespoons of very soft unsalted butter, then spread the lemon-sugar mixture over top. Roll the dough up tightly, starting from the top long end. Stretch and pull the dough taut as you roll, to keep the lemon sugar firm inside. Cut the long dough roll into 12 even rolls. Pinch the bottom of each roll closed to help keep the lemon sugar inside, and place each one, open and cut side up, in the prepared baking dish.

    Cover the rolls with a towel and let them rise for an hour or until puffy and nearly doubled. (You can also refrigerate the rolls at this point. Cover the pan tightly with plastic wrap or a towel, and place it in the refrigerator for up to 24 hours. When you are ready to bake the rolls, remove the pan from the fridge, and let them rise for an hour before proceeding with baking.)

    Heat the oven to 350°F. Place the risen rolls in the oven and bake for 35 minutes or until they are golden brown on top.

    Make the glaze
    While the rolls are baking, prepare the glaze. In a mixer or a with sturdy whisk, whip the cream cheese until light and fluffy. Add the remaining lemon juice and blend until well combined. Add the powdered sugar and blend until smooth and creamy. Add more sugar if necessary.

    Finish the rolls
    When the rolls are done, smear them with the cream cheese glaze, and sprinkle the leftover lemon zest over the top to garnish. Let cool for at least 10 minutes before serving, but do serve while still warm.


    These rolls will keep for awhile in the fridge and taste just as good when heated in the microwave. 
    Since our family is small we tend to have lots of leftovers, but if you have a large family or lots of people over you will have no problem finishing these off.

    Enjoy!


  7. Buffalo Chicken Pizza

    Thursday, March 14, 2013

    in 

    I'm a huge fan of Buffalo Chicken Pizza. It all started when I went to Houghton College. I worked in the downstairs cafe/snack shop that served wraps, hamburgers, fries, chicken wings, pizza, milkshakes and a few other unhealthy college staples. While the food was not all that fresh and pretty much everything came frozen or jarred, it did start my buffalo chicken pizza obsession. When I first heard about it I thought that it was super gross, until I tried it. Where had been this deliciousness been all my life?! 

    Since I worked in the snack shop, I could customize anything I made for myself to the way I liked it. So now that I'm living in my own home with a family and I have all the ingredients to make it all from scratch it's just that more delicious. 

    Ever since I found a bread machine at a yard sale for $5, I've been using it to make my pizza dough. But I'll be putting in my recipe to make it by hand, which is slightly different, because I know that not everyone has a bread machine - and this is how I used to make my pizza dough before.


    Buffalo Chicken Pizza

    Pizza Dough (makes 2 medium round crusts)
    - 3 1/2 cups flour
    - 1 1/2 cups warm water
    - 2 1/4 tsp active dry yeast
    - 2 tsp salt
    - 1 tsp sugar
    - 2 TB oil

    Toppings
    - one chicken breast
    - salt and pepper
    - mozzerella and parmesan cheese
    - Blue Cheese dressing, preferably with chunks


    Pizza Dough
    Combine yeast, warm water and sugar in a bowl and wait for yeast to activate, roughly 10 minutes.
    Add in oil, salt, and flour (cup by cup) while mixing with a mixer with a dough hook attachment. 
    When the dough becomes thick enough, knead by hand for at least 5 minutes (can also be done with a dough hook). 
    Let it rise in an oiled bowl covered with a dishcloth for 1 1/2 hours.
    It's now ready to shape and make into pizzas.

    Pizza Assembly and toppings
    Preheat oven to 450 degrees Fahrenheit.
    While the dough is rising, you can make the chicken and buffalo sauce.
    To make the chicken, simply season with salt and pepper, cut into bite sized pieces and cook in a skillet until done. Set aside.
    Make the buffalo sauce by combining the blue cheese dressing and Frank's Buffalo sauce in a 2:1 ratio (I like mine pretty spicy, feel free to add more or less blue cheese dressing to either tone it down or increase spiciness.) 
    Shape half of the pizza dough into a circle or square (depending on your preference or shape of your pan), and prick the dough with the tines of a fork to keep it from puffing too much. Leave about a inch around the edge of the dough for the crust. Dust the pan with a thin layer of cornmeal to keep the dough from sticking to  it and put the dough in the oven for 5 -10 minutes until mostly cooked though but not browned.
    Once the dough has been pre-baked, take it out and re-prick the dough with a fork. Top with the buffalo sauce, cooked chicken and mozzarella cheese. Bake until the cheese is melted and the crust is golden brown.
    Top the finished pizza with Parmesan cheese if you wish. Let cool for about 10 minutes before cutting into slices.

    Enjoy!


  8. Spiced Chocolate Risotto

    Monday, March 11, 2013


    I made this as a version of Champurado I guess, my best friend's mom is Filipino, and she would make Champurado for us for breakfast. Which is far easier to make than chocolate risotto, but I had some leftover risotto that I wanted to use up so I searched recipes online until I found a method I wanted to use.

    Spiced Chocolate Risotto
    adapted from here

    - 1 cup arborio rice
    - 1 TB butter
    - pinch of salt
    - 4 cups milk
    - 1/2 tsp ground cardamom
    - 1/4 tsp ground cinnamom
    - 1/4 tsp nutmeg
    - pinch of ground cloves
    - 1/4 cup sugar
    - 2 TB cocoa powder (more or less to your taste)
    -1/2 tsp vanilla extract
    - whipped cream for garnish (I also added coconut flakes and sliced almonds for texture)


    Toast the arborio rice in a pan along with the butter and a pinch of salt.
    While the rice is toasting, bring the milk to a simmer in a pot along with the cardamom, cinnamon, nutmeg, cloves and sugar.
    Once the rice has been toasted and the spiced milk has come to a simmer, start adding in the milk to the rice in half-cup increments. Only adding more when the previous cup has been completely absorbed.
    When there is about one cup left of milk, add in the cocoa powder and stir to completely mix it in. Continue adding the milk until it is all gone and absorbed by the rice. It should be al dente; not too soft and not too crunchy or chewy.
    Remove from the heat and stir in the vanilla.
    Serve topped with whipped cream and any garnish you prefer.
    Enjoy.